Introduction to Artisan Bread Recipe
Why Every Young Professional Should Try Baking Artisan Bread
Have you ever walked into a bakery and been greeted by the warm embrace of freshly baked bread? The aroma wafting through the air not only tantalizes your senses but also stirs up thoughts of relaxing weekends spent at home. Baking artisan bread is an experience everyone should try, especially for young professionals looking to unwind after a long week.
Baking bread might seem daunting, but it’s actually quite straightforward. According to experts at the Bread Bakers Guild of America, making your own bread allows you to control the ingredients and avoid the preservatives found in commercial options. Plus, engaging in the tactile joy of kneading dough can be a surprisingly therapeutic activity after a stressful workday. Have you ever felt the satisfaction of creating something from scratch? Artisan bread offers just that, serving as a perfect gateway to explore more culinary passions.
Let’s take a look at some compelling reasons to hop on the artisan bread bandwagon:
- Boost Your Culinary Skills: Baking bread can elevate your cooking game, offering skills that are transferable to countless other dishes.
- Impress Friends and Family: Imagine the looks on your friends’ faces when you show up with a loaf of crusty, homemade bread to accompany that turkey bacon sandwich or vegetable spread at your next brunch. Talk about a conversation starter!
- Personalized Flavors and Ingredients: Whether you prefer adding herbs, nuts, or even experimenting with different flours, making your own bread allows you to create unique flavors. The world of bread-making is your oyster!
The beauty of an artisan bread recipe lies in its simplicity. With just a few basic ingredients — flour, water, salt, and yeast — you can whip up a loaf that surpasses what you might find in your local store.
Incorporating bread baking into your routine offers not just a delicious end product, but also a creative and mindful outlet. So why not give it a try? For more inspiration, you can check out renowned food blogs like King Arthur Baking and The Fresh Loaf.

Ingredients for Artisan Bread
Essential ingredients for a basic artisan bread
When it comes to crafting a delightful artisan bread recipe, the essential ingredients are quite simple. You’ll need:
- Flour: Use high-protein bread flour to ensure that your loaf has the right structure and chewiness.
- Water: Fresh, room-temperature water is ideal. The hydration level is key to achieving that beautiful crust and airy crumb.
- Yeast: Active dry yeast works perfectly for rising; don’t forget a pinch of sugar to give it a little boost!
- Salt: This isn’t just for flavor; salt controls fermentation and strengthens the dough.
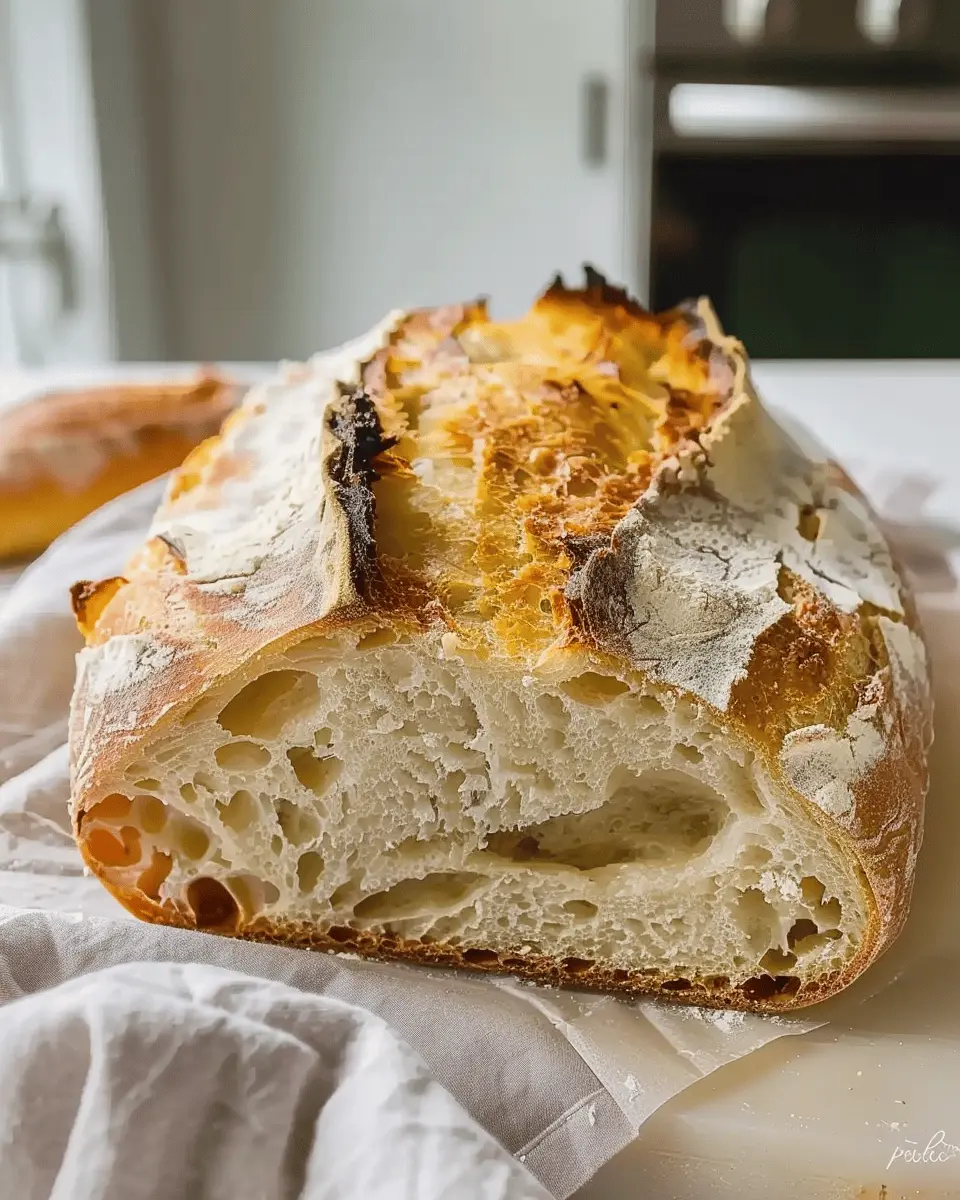
These four components can create a rustic loaf with a crunchy crust and chewy interior. It’s incredible how basic ingredients come together to create something extraordinary!
Optional ingredients for flavor and texture
To elevate your artisan bread recipe, consider adding:
- Herbs and spices: Fresh rosemary or garlic can impart vibrant flavors.
- Seeds or nuts: Add texture and nutrition—think sunflower seeds or walnuts.
- Olive oil: A splash can give your bread a lovely richness.
Experimenting with these optional ingredients can lead to unique variations that make your bread truly your own. Enjoy the process and let your creativity flow! For more tips on bread-making, check out Breadtopia for expert advice and resources.
Preparing Artisan Bread
Baking artisan bread at home can be one of the most rewarding culinary experiences. With a few simple steps, you’ll create a crusty loaf with a tender, chewy interior that’s perfect for any meal. Let’s walk through the essential steps to ensure your bread turns out perfectly every time.
Gather and Measure Your Ingredients
The foundation of any great artisan bread recipe is using high-quality ingredients. You’ll need:
- Flour: All-purpose flour or bread flour works great. Bread flour has a higher protein content, which is perfect for that chewy texture.
- Water: Use room temperature water. Some bakers swear by filtered water as it can create a better fermentation environment.
- Salt: A good coarse sea salt will enhance flavor and strengthen gluten.
- Yeast: Active dry yeast or instant yeast — make sure it’s fresh for the best rise.
Tip: Measuring your ingredients accurately is crucial. Investing in a kitchen scale can be a game-changer. A simple conversion chart can also help you if you opt for measuring cups instead.
Combine Flour, Water, and Salt
In a large mixing bowl, combine your measured flour and salt. Make a well in the center and pour in the water. If you’re using dry yeast, you can mix it into the flour first or activate it separately in warm water. Stir the mixture until it starts to come together. It’s okay if it’s a bit shaggy at this stage; that’s part of the charm of baking artisan bread.
Knead the Dough (or Use a No-Knead Method!)
Here’s where you can decide how hands-on you want your experience to be:
-
Traditional Kneading: On a lightly floured surface, knead the dough for about 10 minutes. This process develops the gluten, resulting in a nice structure. You want the dough to be smooth and elastic.
-
No-Knead Method: If you’re short on time or just don’t want to knead, try the no-knead method. Mix everything, cover it, and let it rest for several hours or overnight. This long fermentation allows the dough to develop flavor and strength.
Let the Dough Rise
Once your dough is mixed and kneaded, it’s time for the first rise. Place it in a lightly oiled bowl, cover it with cloth, and let it sit at room temperature for about 1-2 hours, or until doubled in size. The environmental conditions affect the rise, so be patient and keep an eye on it.
Fun Fact: The fermentation process not only helps the dough rise but also develops that fantastic flavor we all love in artisan bread.
Shape the Dough for Baking
After the first rise, punch the dough down gently to release any air bubbles. Then, turn it out onto a floured surface and shape it into a round or oval loaf based on your preference. Tuck the edges under to create tension on the surface, which will give you that beautiful rise in the oven.
Bake the Bread to Perfection
Now comes the exciting part: baking! Preheat your oven to 450°F (232°C) and place a baking stone or inverted baking sheet inside to heat up (this helps create steam, which is key for a crispy crust).
- Place the shaped loaf onto parchment paper (easier to move) and score the top with a sharp knife or razor to allow for expansion.
- Slide the loaf onto the hot baking surface and bake for 25-30 minutes, until the crust is golden and the bread sounds hollow when tapped.
Serving Suggestion: Toss this freshly baked artisan bread with some flavored olive oil or dip it in a savory broth for an unforgettable experience.
By following these steps, you’ll turn out artisan bread that not only fills your kitchen with an irresistible aroma but also delights your taste buds. So, gather your ingredients, roll up your sleeves, and enjoy the magical process of bread-making!

Variations on Artisan Bread
If you’re eager to explore the potential of your artisan bread recipe, there are countless delicious variations to try. The beauty of artisan bread is its versatility, letting you experiment with flavors and textures. Let’s dive into two delightful options that elevate your baking game!
Herb-Infused Artisan Bread
Imagine biting into a warm loaf filled with aromatic herbs. This variation can elevate a simple meal into something extraordinary. To create herb-infused artisan bread, consider incorporating fresh herbs like rosemary, thyme, or basil right into your dough.
- How to do it: Add 2 tablespoons of finely chopped fresh herbs to your dough during the mixing stage.
- Benefits: Fresh herbs not only enhance flavor but also provide antioxidants, adding a health boost to your bread.
This fragrant bread pairs wonderfully with soups and salads or can be enjoyed on its own with a drizzle of olive oil. For more on this herb-infused approach, check out resources like The Herb Society of America.
Cheese and Chili Artisan Bread
If you crave a savory twist, why not try cheese and chili artisan bread? The combination of gooey cheese and a hint of spice makes for a loaf that’s hard to resist.
- How to do it: Fold in 1 cup of shredded cheese (like cheddar or mozzarella) and 1-2 teaspoons of red pepper flakes into your dough.
- Serving suggestion: This bread is perfect for game nights or casual gatherings. Just slice and serve with a fresh avocado dip for a crowd-pleaser.
Experimenting with these variations not only showcases your baking skills but also provides an opportunity to impress friends and family. Which flavor combination will you try first? Happy baking!
Cooking tips and notes for Artisan Bread
Baking artisan bread can be a rewarding experience, but it’s easy to stumble along the way. Here are some common mistakes to avoid that may lead to disappointment:
Common mistakes to avoid when baking
- Not measuring correctly: Precision is key. Using a food scale can help ensure accurate measurements, particularly with flour, which is often the main ingredient in an artisan bread recipe.
- Ignoring the dough’s feel: Each batch can be different, so trust your instincts. Instead of just looking at the time, assess the dough’s texture and adjust accordingly.
- Skipping the proofing stage: This step is crucial for developing flavor and texture. Patience is your friend; let the dough rise for the full recommended time.
- Bad oven temperatures: An oven thermometer can help you verify what temperature your oven is actually at. For the best crust, a hot oven is essential.
For additional tips, visit King Arthur Baking for expert advice and resources. With a little care and attention, your artisan bread will shine!

Serving Suggestions for Artisan Bread
Best Accompaniments for Freshly Baked Bread
Enjoying a slice of homemade artisan bread is one of life’s simple pleasures. Once your loaf is out of the oven, you may wonder what to pair it with for the best experience. Here are some delightful suggestions that will elevate your taste buds:
-
Savory Spreads: A rich, creamy butter can warm your bread to perfection. For a twist, try garlic butter or herb-infused spreads. You can also explore hummus or an olive tapenade to add a Mediterranean flair.
-
Charcuterie Options: Create a mouthwatering platter featuring turkey bacon, chicken ham, and robust cheeses like aged cheddar or brie. This not only enhances the bread but also makes for a beautiful presentation.
-
Fresh Veggies: A side of vibrant, seasonal vegetables, like roasted bell peppers or marinated artichokes, pairs wonderfully. These add a fresh contrast to the soft texture of your loaf.
-
Sweet Indulgences: For a breakfast treat, serve your artisan bread with homemade jam or honey. The sweetness beautifully complements the crusty texture.
For more ideas on delicious spreads and pairings, you might want to check out this insightful piece from The Kitchn on bread pairing. Remember, the right accompaniment can transform your artisan bread recipe into an unforgettable meal!
Time breakdown for Artisan Bread
When embarking on your artisan bread recipe, it’s essential to plan your time wisely. Here’s a quick breakdown:
Preparation time
Expect to spend about 20 minutes mixing the ingredients. This is where the magic begins! Gathering high-quality flour, water, salt, and yeast will set you up for a delicious loaf.
Rising time
Now, this is where the real patience comes into play. Let the dough rise for about 2 to 3 hours. During this time, it will gulp up air and expand, leading to that lovely airy texture we all adore. Some bakers even let it rest longer for a better flavor—overnight in the fridge can work wonders!
Baking time
Baking typically takes around 30 to 40 minutes. You’ll know it’s done when the crust is golden brown and it sounds hollow when tapped.
Total time
All in all, you’re looking at about 3 to 4 hours, depending on your rising preferences. Don’t forget: while the hands-on time is relatively short, the waiting is part of the joy of baking! For more tips and tricks on baking bread, check out King Arthur Baking and Serious Eats for some fantastic resources.
Nutritional Facts for Artisan Bread
When considering the delightful artisan bread recipe, it’s essential to understand not just the joy of baking but also the nutritional perks that come with each loaf.
Calories
A single slice of artisan bread typically contains about 80-100 calories, depending on your ingredients. This makes it a satisfying yet manageable component of your meal.
Carbohydrates
Each slice boasts around 15-20 grams of carbohydrates. These hearty carbs provide a great energy source, perfect for fueling your busy day.
Fiber
Most artisan bread varieties offer about 2-3 grams of dietary fiber per slice. Fiber is crucial for digestive health and can help you feel full longer, making it an excellent choice for well-balanced meals.
By choosing an artisan bread recipe that incorporates whole grains or seeds, you can boost the nutritional content and add even more flavor. For more on the benefits of whole grains, check out resources from Whole Grains Council. This insight can help you make choices that align with a healthy lifestyle while enjoying the rustic charm of homemade bread.
FAQs about Artisan Bread
How do I know when my artisan bread is done?
One of the joys of baking is that perfectly baked artisan bread offers a delightful crunch on the outside and a soft, airy interior. But how do you know when it’s truly done? A reliable method is the “thump test.” Carefully turn the loaf over and give it a gentle tap on the bottom; it should sound hollow. Additionally, using a thermometer can help—you’re aiming for an internal temperature of around 190°F to 210°F. This ensures a beautifully baked loaf. For more tips, check out resources from King Arthur Baking.
Can I freeze artisan bread?
Absolutely! Freezing your artisan bread is a fantastic way to preserve freshness. After the bread has cooled completely, wrap it tightly in plastic wrap, followed by aluminum foil, to prevent freezer burn. When you’re ready to enjoy it, just remove it from the freezer and let it thaw at room temperature. For immediate use, you can even pop slices in the toaster for a fast breakfast or snack.
What if my dough doesn’t rise?
Sometimes, despite our best efforts, things don’t go as planned. If your dough isn’t rising, it could be due to inactive yeast. Always check the expiration date of your yeast before using it. Additionally, make sure your water is at the right temperature—too hot can kill the yeast, and too cold will slow its activation. If you’re having consistent issues, consider creating a warm environment (like the oven with just the light on) for fermentation. Curious about the perfect yeast for your artisan bread recipe? Read more on The Kitchn.
These tips will help you navigate the common concerns of baking artisan bread, ensuring a rewarding baking experience!
Conclusion on Artisan Bread
The joy of baking your own bread
There’s something incredibly satisfying about creating your own artisan bread. When you follow an artisan bread recipe, you’re not just following steps; you’re engaging in a tactile, sensory experience that connects you to generations of bakers. Watching dough transform into golden loaves is rewarding, and the aroma that fills your kitchen is simply unparalleled.
Consider the conversations that can blossom over warm slices of bread. Whether you’re hosting friends or sharing with family, homemade bread grounds your meals in comfort and authenticity. Plus, it’s a delightful way to impress your guests! So, roll up your sleeves, enjoy the process, and let your creativity rise. For more encouragement, check out resources like King Arthur Baking and Breadtopia for tips and community support. Remember, every great loaf starts with a little love and patience!
PrintArtisan Bread Recipe: Easy Steps for Irresistibly Fresh Loaves

Learn how to bake artisan bread from scratch with this easy recipe that yields irresistibly fresh loaves.
- Prep Time: 15 minutes
- Cook Time: 45 minutes
- Total Time: 13 hours
- Yield: 1 loaf 1x
- Category: Bread
- Method: Baking
- Cuisine: European
Ingredients
- 4 cups all-purpose flour
- 1 1/2 teaspoons salt
- 1/4 teaspoon instant yeast
- 1 3/4 cups water
Instructions
- In a large bowl, combine flour, salt, and yeast.
- Add water and stir until a sticky dough forms.
- Cover the bowl with plastic wrap and let it sit at room temperature for 12-18 hours.
- After resting, turn the dough out onto a floured surface and shape it into a ball.
- Let it rise for another 2 hours.
- Preheat your oven to 450°F (230°C) and place a Dutch oven inside to heat.
- Carefully transfer the dough into the hot Dutch oven, cover, and bake for 30 minutes. Remove the lid and bake for an additional 15 minutes until golden brown.
- Cool on a wire rack before slicing.
Notes
- For a crustier loaf, use a baking stone or place a pan of water in the oven.
- Experiment with different flours for unique flavors and textures.
Nutrition
- Serving Size: 1 slice
- Calories: 120
- Sugar: 0g
- Sodium: 320mg
- Fat: 1g
- Saturated Fat: 0g
- Unsaturated Fat: 0g
- Trans Fat: 0g
- Carbohydrates: 24g
- Fiber: 1g
- Protein: 4g
- Cholesterol: 0mg
Keywords: Artisan Bread Recipe