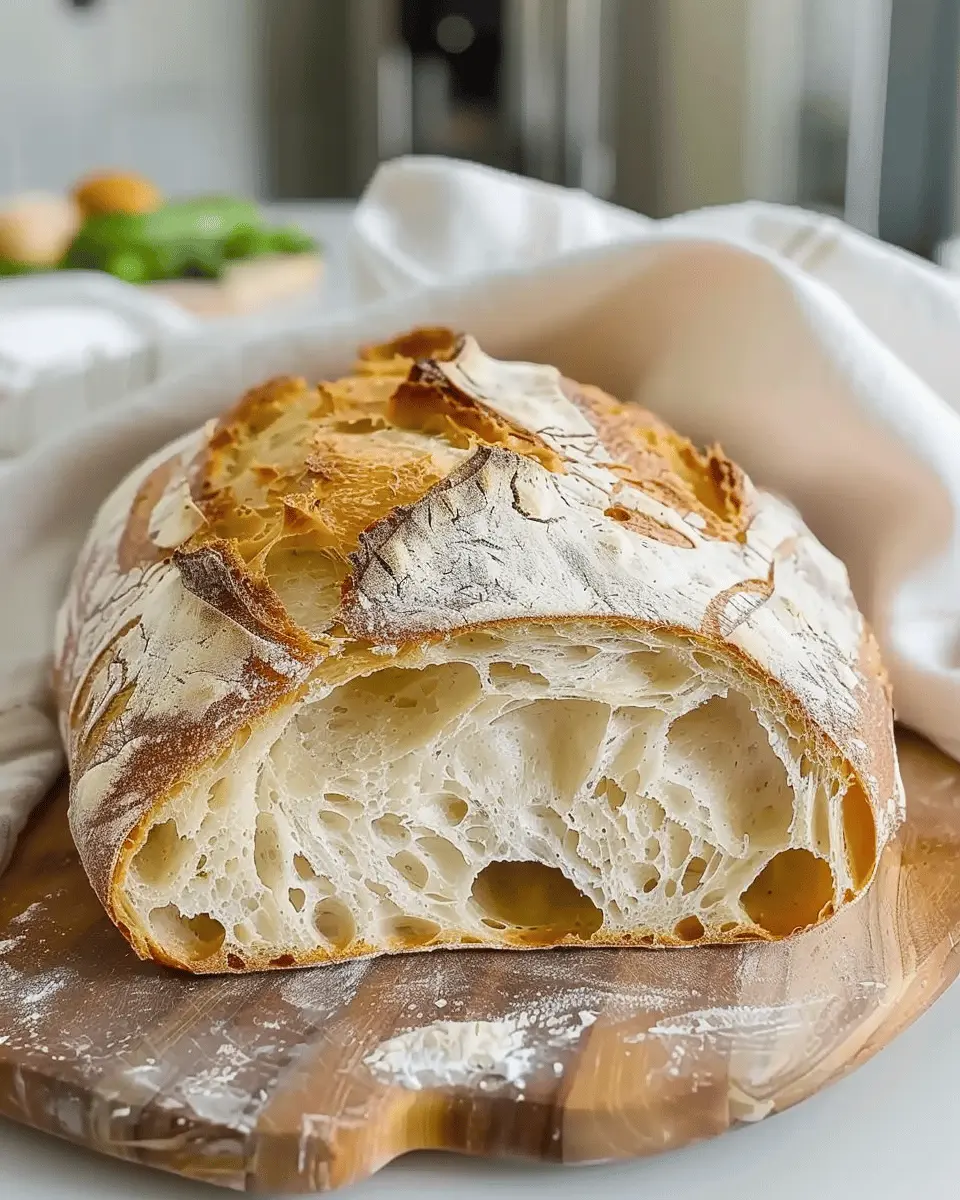
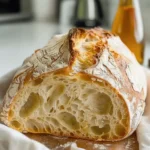
Introduction to Artisan Bread Recipe
Baking artisan bread at home is an experience that transcends mere cooking—it’s indeed a kind of alchemy. Have you ever savored the aroma of freshly baked bread wafting through your home? There’s something magical about transforming simple ingredients like flour, water, and salt into warm, crusty loaves that can elevate any meal.
Why is homemade artisan bread so satisfying?
First and foremost, making your own artisan bread allows you to channel your creativity. Each loaf can be a personal masterpiece, whether you’re experimenting with unique flavor combinations, like adding herbs or seeds, or shaping the dough into interesting forms. Plus, the tactile experience of kneading dough is not just therapeutic but incredibly rewarding. You’re literally using your hands to create something delicious!
Beyond the joy of creation, the health benefits of making artisan bread at home are significant. Commercial breads often contain preservatives and artificial ingredients. When you bake your own bread, you have complete control over what goes into it. You can opt for organic flour or even gluten-free alternatives, leading to healthier meals for you and your family.
According to a report from the Whole Grains Council, incorporating whole grains into your diet can significantly benefit overall health, and what better way to do that than with your own fresh loaves?
Additionally, the sheer satisfaction of pulling a golden-brown loaf from the oven cannot be overstated. There’s a bond of intimacy between the baker and the bread that brings a sense of accomplishment like no other. It’s a toast-worthy moment, perfect to share with friends or serve during cozy dinners.
Have you ever considered inviting friends over for a casual bread-making night? Everyone loves sharing food, and there’s something uniquely bonding about crafting your own bread together. You might even inspire others to start their own baking journey!
So, are you ready to dive into the world of artisan bread? Trust me, the effort is well worth it, and the results? Irresistibly delicious!
Ingredients for Artisan Bread
Essential ingredients for the perfect loaf
Creating a memorable artisan bread recipe starts with the essentials. You’ll need:
- Flour: A high-quality bread flour, ideally with a higher protein content, is important for developing that much-desired gluten structure.
- Water: Use warm water to activate the yeast. Filtered or bottled water works best if your tap water isn’t ideal.
- Yeast: Either active dry or instant yeast will work. Just ensure it’s fresh for the best rise.
- Salt: This isn’t just for flavor; it also strengthens the dough and controls yeast activity.
Did you know that the quality of these core ingredients can make or break your loaf? According to experts, using organic flour often yields better results due to fewer additives (source).
Optional ingredients for added flavor
For those adventurous bakers looking to spice things up, consider adding:
- Whole grains: Incorporate whole wheat flour for a nutty flavor and added nutrition.
- Herbs and spices: Rosemary or garlic can enhance the aroma and flavor of your bread.
- Seeds or nuts: Think sunflower seeds or walnuts for texture and crunch.
These optional ingredients can truly elevate your artisan bread recipe and impress everyone at the dinner table. Plus, experimenting can be half the fun! Always remember that the best bread reflects your personal taste—so don’t be afraid to get creative!
Step-by-Step Preparation of Artisan Bread
Making artisan bread at home isn’t just a culinary task; it’s a rewarding experience that brings warmth and delicious aromas into your kitchen. Whether you’re an experienced baker or a curious novice, follow these step-by-step guidelines to create a loaf that will impress your friends and family.
Gather and Measure Your Ingredients
Before diving into baking, it’s essential to gather and measure all the necessary ingredients. This makes the baking process smooth and efficient. For our artisan bread recipe, you’ll need:
- 3 cups of bread flour
- 1 ½ teaspoons of salt
- 1 teaspoon of sugar
- 1 teaspoon of active dry yeast
- 1 ¼ cups of lukewarm water
Make sure to use a kitchen scale for accuracy if possible. This ensures your dough has the right texture, making all the difference in the final product.
Combine Dry Ingredients
In a large mixing bowl, combine the bread flour, salt, sugar, and yeast. Stir these dry ingredients together until well-blended. The sugar acts as a food source for the yeast, while salt enhances flavor. According to experts, the balance of these ingredients is crucial to a successful rise.
Mix in Water and Form the Dough
Next, make a small well in the center of your dry mixture and pour in the lukewarm water. Using a wooden spoon or your hands, gently mix until the ingredients start to come together into a shaggy dough. This part can be surprisingly therapeutic; embrace the mess!
Knead the Dough
Once your dough is formed, transfer it to a lightly floured surface. Knead the dough for about 10 minutes, until it becomes smooth and elastic. Don’t rush this process! Kneading helps develop gluten, which is essential for achieving that chewy texture we love in artisan bread.
Allow Dough to Rise
After kneading, place your dough in a lightly oiled bowl, cover it with a clean kitchen towel, and allow it to rise. Let it sit in a warm place for 1-2 hours, or until it has doubled in size. The yeast will be working hard, so take this time to clean up your workspace and perhaps enjoy a cup of coffee.
Shape the Dough and Second Rise
Once the dough has risen, gently punch it down to release any air bubbles. Transfer it to a floured surface and shape it into a round or oval loaf, depending on your preference. Place the shaped dough on a piece of parchment paper and cover it again. Let it rise for another 30-60 minutes. This second rise is key to developing flavor and texture.
Preheat the Oven and Score the Bread
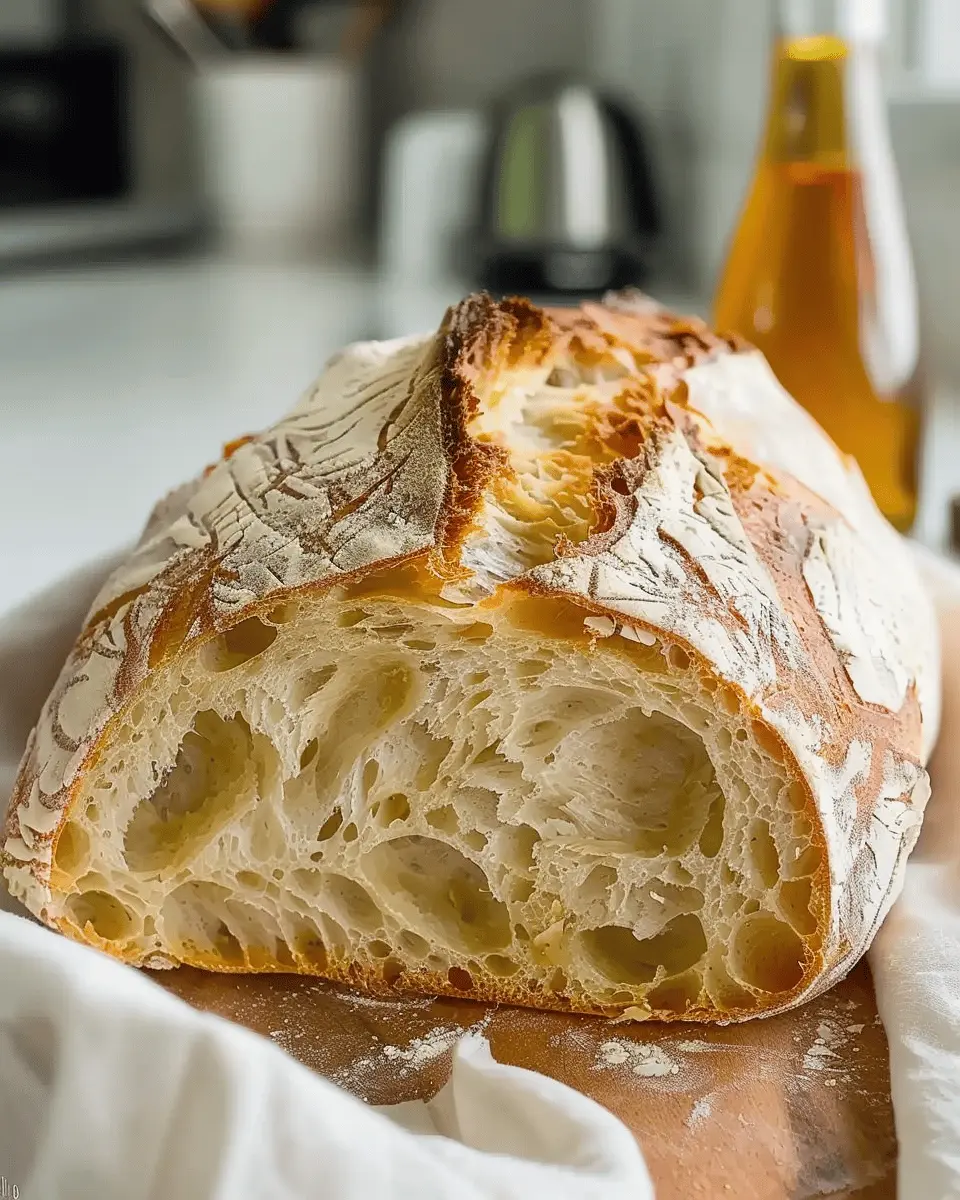
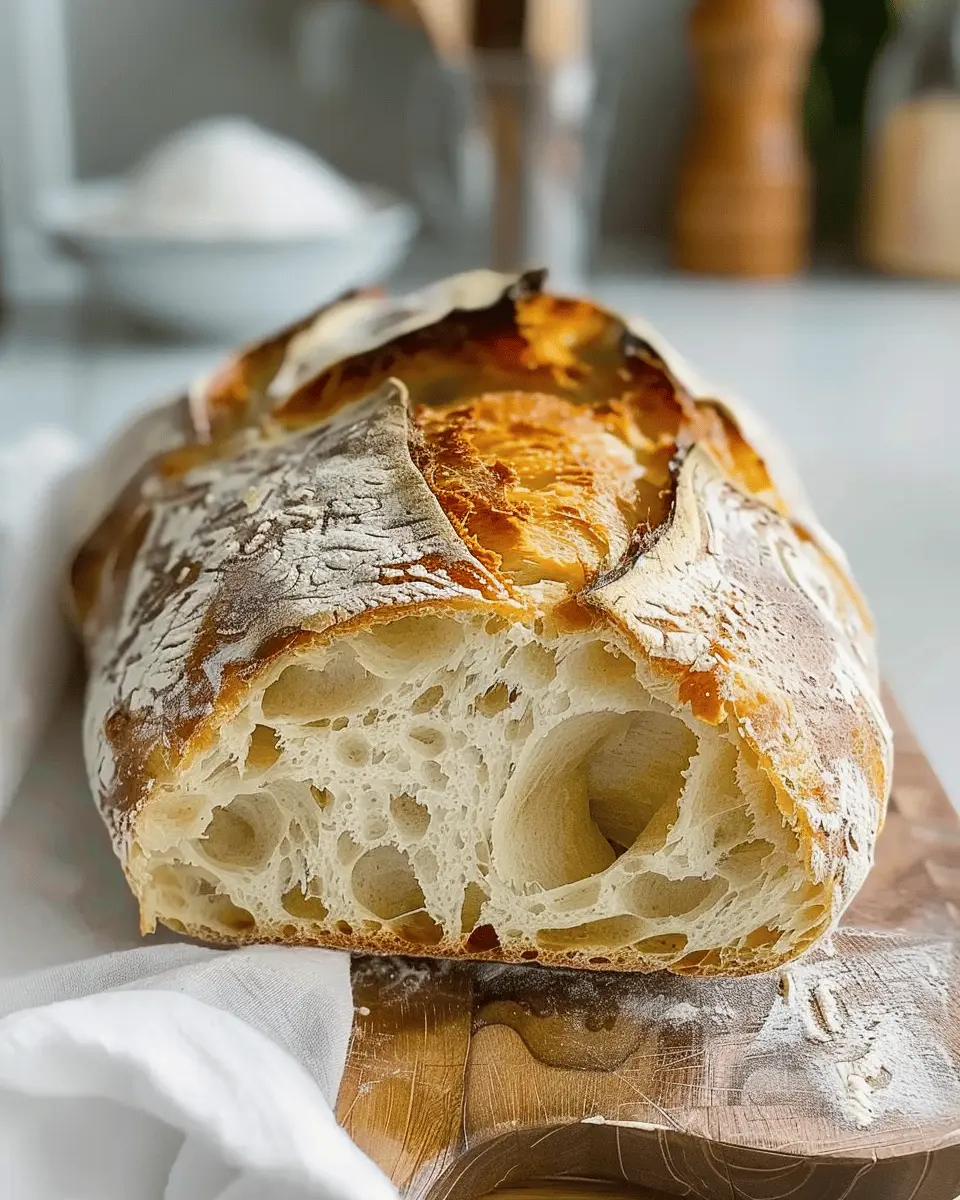
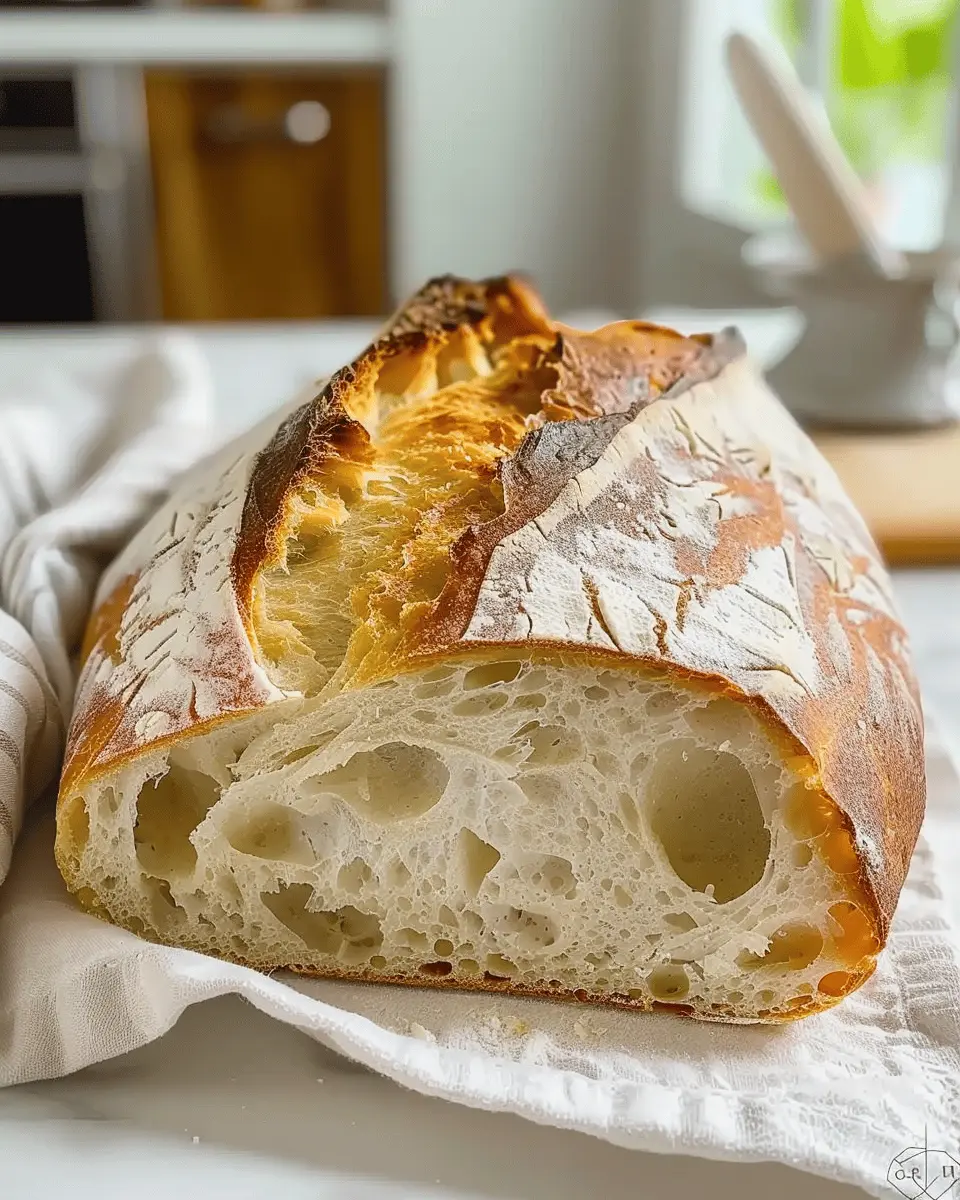
While the dough is rising for the second time, preheat your oven to 450°F (232°C). Additionally, prepare your baking vessel, like a Dutch oven or baking stone. Just before baking, use a sharp knife or a lame (baker’s razor) to score the top of the loaf. This not only adds a beautiful aesthetic but also allows the bread to expand in the oven.
Bake the Artisan Bread to Perfection
Once your oven is hot and your dough is ready, carefully transfer the loaf (with the parchment paper) into the oven. Bake for 30-35 minutes, or until the crust is golden brown and sounds hollow when tapped. The aroma will be enticing, so be prepared to warm your heart and home with this delightful creation.
After your artisan bread is baked to perfection, let it cool on a wire rack. This step is crucial; cutting into warm bread can result in a gummy texture.
Taste and Enjoy
Now comes the best part—slicing into that beautiful loaf and savoring the fruits of your labor. Whether you enjoy it plain or slathered with butter, this artisan bread will surely leave a lasting impression.
By following these steps, you’ll find that baking artisan bread is not only achievable but also immensely satisfying. So roll up your sleeves and get started on your homemade baking adventure! Happy baking!
Variations of Artisan Bread
When it comes to an artisan bread recipe, the beauty lies in its versatility. You can easily customize your loaf by adding flavors and textures that reflect your personal taste. Let’s dive into a couple of popular variations that will elevate your homemade bread experience!
Adding Herbs and Garlic for Flavor
Imagine biting into a slice of warm, freshly baked bread infused with aromatic herbs and a hint of garlic. This combination not only enhances the flavor but also brings a comforting warmth to your kitchen.
- Herbs: Fresh or dried herbs like rosemary, thyme, or basil can add a delightful twist. They pair beautifully, especially if you plan to serve your artisan bread alongside soups or stews.
- Garlic: Roasted or sautéed garlic brings a rich, mellow flavor. Just be cautious with the amount, as too much can overpower the delicate notes of your bread.
This approach not only enhances taste but also transforms your loaf into a gourmet creation!
Incorporating Seeds for Texture
Texture plays a crucial role in any bread, and adding seeds can take your artisan bread recipe to another level.
- Sunflower Seeds: These provide a nutty flavor and delightful crunch.
- Sesame Seeds: Great for a subtle, earthy sweetness, perfect for topping.
- Flaxseeds or Chia Seeds: These can add a nutritional boost along with interesting textures.
Including seeds not only enhances the flavor but also contributes to the nutritional profile of your bread. Did you know that flaxseeds are rich in Omega-3 fatty acids? Adding them can be a fantastic way to incorporate healthy fats into your diet!
Experimenting with different artisan bread variations allows you to make each loaf uniquely yours, catering to your cravings and dietary needs. For more inspiration, check out BBC Good Food and King Arthur Baking for recipes that will spark your creativity!
Cooking Tips and Notes for Artisan Bread
Best Practices for Kneading and Rising
When following an artisan bread recipe, the kneading process is crucial for developing gluten, which gives your bread its structure. Aim for about 10 minutes of kneading—this helps create that lovely chewy texture we all love. To ensure proper rising, place your dough in a warm, draft-free spot; covering it with a damp cloth can help retain moisture.
Pro tip: If your dough isn’t rising as it should, check your yeast’s expiration date. Fresh yeast = a happier loaf!
Common Pitfalls and How to Avoid Them
One common mistake is adding too much flour, thinking it will help with stickiness. Instead, it can make your bread dense. Start with the recommended amount, and add flour incrementally as needed. Also, don’t rush the rising process! Skipping the time can lead to a loaf that lacks flavor and texture.
Lastly, for a crispy crust, try placing a pan of water in the oven while your artisan bread bakes. This steam creates that beautiful crust we crave! For more tips on artisan bread, check out James Beard Foundation.
Serving Suggestions for Artisan Bread
Pairing Artisan Bread with Dips and Spreads
Artisan bread is a treat on its own, but it becomes extraordinary when paired with delicious dips and spreads. Think of your favorite hummus or a creamy spinach dip—these can elevate your bread experience to a gourmet level. For a fresh twist, try a homemade tomato basil bruschetta or a zesty olive tapenade.
Did you know that pairing bread with high-quality oils or vinegars can also make a delightful appetizer? Drizzling extra virgin olive oil or balsamic vinegar on your artisan bread brings out those rich flavors, creating a palate-pleasing experience. Explore more pairing ideas on culinary sites like Food Network for terrific inspiration.
Creative Sandwich Ideas Using Artisan Bread
Once you’ve mastered your artisan bread recipe, consider using it to craft unique sandwiches. The hearty texture makes it perfect for stacking fillings. Try a turkey bacon and avocado sandwich topped with fresh greens for a nutritious option. Or whip up a chicken ham and pesto creation that’s both satisfying and flavorful.
Feeling adventurous? How about a grilled cheese with sharp cheddar and roasted veggies? The possibilities are endless! Whether for lunch or a casual dinner, update your sandwich game with artisan bread, and share your creations on social media—it’s a fun way to connect with fellow foodies!
Time Breakdown for Artisan Bread
Preparation Time
Making artisan bread is a rewarding endeavor that begins with about 30 minutes of preparation. This includes measuring your ingredients, mixing the dough, and getting ready for the exciting rising phase. Don’t forget to enjoy this creative moment—baking is as much about the process as it is about the end result!
Rising Time
Now comes the magic—the rising time. Expect to let your dough rise for 6 to 12 hours, often overnight. This slow fermentation not only develops flavor but also creates that beautiful texture artisan breads are known for. Got some extra time? Embrace it!
Baking Time
The final stretch is the baking time, which typically takes about 30 to 45 minutes. Watching your loaf transform into a golden masterpiece is truly satisfying. Just make sure to preheat your oven, so everything bakes evenly.
Total Time
When you add it all up, you’re looking at approximately 7 to 13 hours from start to finish. However, most of that is hands-off time, letting the dough do its thing while you tackle your daily routine. Grab a coffee, listen to your favorite podcast, and enjoy the wait!
For a deeper dive into the artisan bread recipe, check out King Arthur Baking for additional tips and tricks that can elevate your baking experience. Curious about the science behind bread-making? The Bread Lab offers excellent insights too!
Nutritional Facts for Artisan Bread
Calories per slice
When you indulge in a slice of artisan bread, you’re treating yourself to approximately 80-100 calories per slice, depending on the specific ingredients and portion size. This makes it a lovely choice for those looking to enjoy a hearty, satisfying bread without overdoing it on calories.
Carbohydrates and fiber content
Artisan bread is rich in carbohydrates—typically around 15-20 grams per slice. The beauty of using whole grains or added seeds is that you often get a good amount of dietary fiber, which can range from 1 to 3 grams. This fiber assists with digestion and may help you feel fuller for longer. For more information about the benefits of fiber, check out this article from the Harvard T.H. Chan School of Public Health.
Key vitamins and minerals
With a simple list of ingredients, artisan bread can still pack a nutritional punch. It typically provides essential vitamins and minerals like:
- B vitamins (important for energy and metabolism)
- Iron (crucial for oxygen transport in the blood)
- Magnesium (supports muscle and nerve function)
These components are often enhanced if you opt for fortified or whole-grain varieties. As you whip up your artisan bread recipe, consider adding in seeds or whole grains for an extra health boost!
Feeling more informed? Great! Now that you know the benefits, let’s dive into the recipe itself. The choice is yours: will you stick with a classic, or dare to add your unique twist?
FAQs about Artisan Bread
Can I make artisan bread without a Dutch oven?
Absolutely! While a Dutch oven is fantastic for creating that perfect crust, there are other ways to bake artisan bread. You can use a regular baking sheet or a cast-iron skillet. If you choose a baking sheet, simply place a pan of water in the oven to create steam during the first few minutes of baking. This steam is key to achieving that golden, crusty exterior. Curious about the science behind steam in baking? Check out this article on the benefits of steam in bread baking.
How do I store homemade artisan bread?
Storing your homemade artisan bread properly is essential for maintaining its texture and flavor. Here are some simple tips:
- Wrap in a towel: Store your bread in a cotton or linen towel to help it breathe while keeping it moist.
- Bread box: If you have one, a bread box is ideal for maintaining a stable temperature and humidity.
- Freezing: For longer-term storage, slice your bread and wrap it tightly in plastic wrap, then place it in a freezer bag. When you’re ready to enjoy it, just toast or let it thaw at room temperature.
By following these steps, you can ensure your artisan bread remains fresh for days!
What if my dough doesn’t rise properly?
Don’t worry; this happens to the best of us! If your dough isn’t rising, it could be due to several factors:
- Yeast activation: Make sure your yeast is fresh and properly activated. A quick test? Add it to warm water with a pinch of sugar; if it bubbles, you’re good to go!
- Temperature: Dough loves warmth. Let it rise in a warm, draft-free spot. You can even use your oven with the light on for a cozy environment.
If you ever need a helping hand, there are tons of resources available, like this guide on troubleshooting bread-making issues.
Enjoy your baking journey!
Conclusion on Artisan Bread
Embracing the Joy of Baking Your Own Bread
Baking your own artisan bread is more than just a culinary task; it’s a delightful experience that transforms your kitchen into a haven of warmth and aroma. Think about the satisfaction of pulling a crusty loaf from the oven, the golden brown hue, and those enticing aromas wafting through your home.
By following this artisan bread recipe, you not only gain a delicious staple for your meals but also an enjoyable hobby. As you experiment with flavors and techniques, you may find it becomes a cherished part of your routine. Plus, using quality ingredients can significantly elevate your bread. When was the last time you really savored a warm slice of homemade goodness? So, why not take that leap and make baking your very own artisan masterpiece? For more inspiration and trends, check out The Bread Lab or King Arthur Baking.
Baking might just awaken a passion you didn’t know you had!
PrintArtisan Bread Recipe: The Best Easy Bread for Home Bakers
This artisan bread recipe is perfect for home bakers looking for an easy and delicious way to make fresh bread.
- Prep Time: 15 minutes
- Cook Time: 45 minutes
- Total Time: 13 hours
- Yield: 1 loaf 1x
- Category: Bread
- Method: Baking
- Cuisine: American
- Diet: Vegetarian
Ingredients
- 3 cups all-purpose flour
- 1.5 teaspoons salt
- 1 packet active dry yeast
- 1.5 cups warm water
Instructions
- In a large bowl, mix the flour, salt, and yeast.
- Add warm water and mix until a sticky dough forms.
- Cover the bowl with a damp cloth and let it rise for 12-18 hours.
- Preheat the oven to 450°F (230°C).
- Shape the dough on a floured surface and let it rest for 30 minutes.
- Transfer the dough to a hot cast-iron pot and cover it with a lid.
- Bake for 30 minutes covered, then 15 minutes uncovered until golden brown.
Notes
- Let the bread cool completely before slicing.
- For added flavor, consider adding herbs or cheese to the dough.
Nutrition
- Serving Size: 1 slice
- Calories: 150
- Sugar: 0.5g
- Sodium: 350mg
- Fat: 1g
- Saturated Fat: 0g
- Unsaturated Fat: 0g
- Trans Fat: 0g
- Carbohydrates: 30g
- Fiber: 1g
- Protein: 5g
- Cholesterol: 0mg
Keywords: Artisan Bread Recipe, Homemade Bread, Easy Bread Recipe